Wednesday, October 31, 2012

Day 328: It’s Alive! FrankenChick Lives!

10/31/12

October ends on a bittersweet note with the hatching of my first incubated chick. It’s been a rough couple of months with chicken-mama-drama. If 
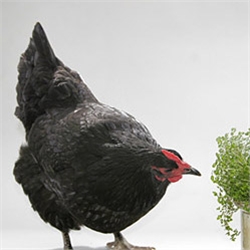
you read earlier posts, you know my troubles. But since it's been a while since I last posted, allow me to recap.  This summer, raccoons killed off my flock. After the attack, I was left with only Lucy, a hyper black Astrolop that no one was particularly fond of. Well, in times of mourning, strangers become friends. I grew to adore Lucy, just as I adored her lost coop mates. I adopted a rouge rooster named Gerry, an Americana banished from his cul-de-sac because he can’t tell time and was disturbing neighbors with late-night and early morning crowing. He’s a lovely guy, but he can be annoying.

 
My hope was that Lucy and Gerry would produce a chicks and rebuild the flock. But Lucy refused to sit on her eggs. I found a broody hen on Craigslist, a plump Rock Hampton named Ronda, to serve as a surrogate mama. Ronda's previous owner swore the hen was broody, wouldn’t lay eggs, horded eggs of others and defended the nest with nasty pecks. I figured Ronda would work out perfectly.

I introduced Ronda to the coop. Unfortunately, she fell in love with handsome Gerry and forgot all about sitting on eggs. She and Gerry became an item. To my surprise, she started laying eggs after a year of reported dormancy. Gerry woke up the woman in her. Go figure.

I was thrilled to have two layers, but disappointed that neither wanted to nest. One afternoon Lucy was on the nest. I hadn’t gathered eggs in a while, so there was a pile up. I reached underneath her and she attacked my arm. This was new. I let her keep the eggs, partly because she scared me and partly because I was curious. She stuck with the process, and after a couple of weeks, I moved her and the eggs into my office. Crazy Lucy had gone broody after all.


After three weeks, three little black chicks tucked beneath her wings. I waited a few more days, hoping more would hatch, but no luck. Two failed to make it from the shell alive and the other eggs may have been infertile. But I was happy. Lucy and her chicks lived in my office for a couple of weeks. It’s not as bad as it sounds. She kept her crate tidy, and I welcomed the distraction.
 

My interest in incubation grew, as broody hens are few and far between. I made a homemade incubator from an old 6-pack cooler I found in the garage. I used Ronda’s fertile eggs, since Lucy was busy doing mom things, and Ronda was busy doing Gerry. Things seemed to be working well with the hot water thermostat I installed to keep the incubator at 99.5 degrees. It was a pain to turn the eggs three times per day, and it put a serious cramp in my travel schedule. Eggs should be turned every 8 hours to prevent the developing chick from sticking to the shell. I didn’t have to worry about it for long, because on day 6 something went haywire with the thermostat, and I cooked the eggs. Ugh. Failure.

I ordered a mini incubator online, one with automatic turning. Heaven. Of course Ronda stopped laying shortly after the thing arrived, giving me only 3 eggs to hatch. I set the incubator up in my office and loaded the three eggs. I hoped 2 out of the 3 would hatch. Combined with Lucy’s three babies, I figured five new birds would be enough to replace my lost flock. And this is where the old adage, “Don’t count your chickens before they hatch,” comes into play.


Meanwhile, Lucy and her chicks and a young Coo-coo Moran rooster made their home in my commercial greenhouse. The chicks were fully feathered and carbon copies of their mama. Life in the greenhouse was grand. Days were spent scratching up the raised beds, hunting for slugs, bugs, worms and grubs. Composting produce made a never ending feast. Nights were warm, and there was room to fly. Utopia. The only care in the world, and it was a big one, came a few nights ago when raccoons found a way into the greenhouse. The raccoons killed every last bird. The 3 babies, Lucy, and the Coo-coo Maran are all gone. End of chicken utopia.

So, it’s a bittersweet Halloween morning as I welcome Frankie to the world. I wonder how I’ll keep her safe. I can’t keep raising chicks to serve as raccoon food. I understand the risks of raising animals. I understand that Mother Nature rules. I find it odd that  the years of growing up on a farm failed to harden me. My heart breaks easy and often.  

As I wait for the other eggs to hatch, I’m scanning the internet for live raccoon traps. My forgiving self argues with my mother-rage, "A raccoon must eat too." Mother-rage  always wins. I heard raccoon tastes like chicken. Maybe I’ll find out.


Friday, September 7, 2012

Reconsidering Salal

9/1/12
Salal brush

Late August has to be the best time for northwest berry foragers. Food fell in my lap all month. I picked gallons of wild blackberries and red huckleberries, treating my family to pies and cobblers. Blackberries and huckleberries are familiar to me, of course. But gathering Salal berries was a new adventure. Up until now, I’ve never appreciated the brushy crap that entangles feet plodding a trail, making it impossible to stalk deer with any kind of stealth. But this changed for me this year. It was love at first bite – well, almost.

Salal brush lines forest floors in the Northwest and invades my flowerbeds. I never liked the stuff and until recently, failed to see the plant as a food source. Even if you are not from the northwest, you’ve probably seen the plant before. Salal bows are those leathery, oval-shaped leaves used as greenery in commercial floral arrangements.

I first learned about the Salal floral industry while teaching English as a second language in Shelton, Washington. Many of my students were brush pickers. Brush picking is miserable and wet labor, but it’s also controversial and sometimes dangerous. Salal is cut on public lands by migrant laborors, under the charge of a salal dealer. Some dealers are shady, acting more like pimps than middlemen engaging in the cut flower business. Dealers may become territorial and have been known to take advantage of undocumented folks. An undocumented worker has little recourse, if any, for work-related abuse. My work in Shelton tainted my view of Salal.
 
It’s been years and several boyfriends ago since my last delivery of a dozen roses. But I remember the sprig of Salal. I plucked it from the bouquet and tossed it in the trash.

I assumed the hairy-looking black berries dangling on tendrils were poisonous. After researching the red huckleberry this summer, I came across enlightening information. Not only are Salal berries edible, but they taste alright and possess admirable culinary qualities. I was most interested in the berry as a natural source of pectin. Pectin is a mixture of polysaccharides found in the cell wall of plants. In the culinary world, it is used as a thickening agent and may purchased in powder or liquid form. I do not like purchasing pectin packets because it adds expense to the final product. But some berries and other fruit spreads require the extra pectin boost to jell. 
 
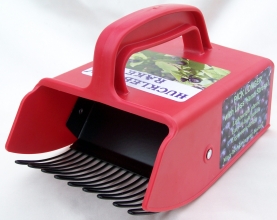
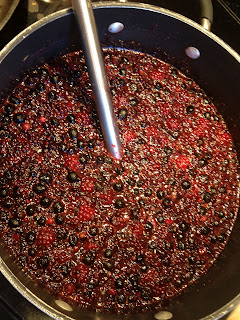
blackberry-Salal jam

Salal berries are ridiculously sweet and require a lower amount of sugar to make jam, jelly, relish, or chutney. When making blackberry jam, the sugar to berry ratio is about one to one. I experimented with Salal berries and created a similar recipe to the red huckleberry jam I made in July. But this time I cut the sugar down by two-thirds. The experiment turned out delicious and jelled almost immediately upon reaching the boiling stage.

Killer Salal Jam
·         4 cups of berries
·         1/2 cup raw sugar
·         1 tablespoon cinnamon
·         Shredded orange peel of a large orange
·         Pulp and juice of the large orange
·         1/4 cup lime juice
·         1 cup red wine
·         1/4 cup fig balsamic

Thrilled with the taste and success of Salal jam, I modified my blackberry jam recipe to include 1 part Salal to three parts blackberry and a third less sugar. I would have used more Salal and consequently less sugar, but blackberries were ever-abundant and easy to pick. Salal berries, like huckleberries, are tedious to gather.

Shortly after the mixture reached boiling stage, the Salal pectin kicked in. I ladled the jam, now black as night, into crystalline canning jars and processed for 15 minutes in a hot water bath. The recipe below produced fifteen 8-ounce jars.   

Blackberry- Salal Jam
·         12 cups blackberries
·          4 cups Salal berries
·         1 cups fresh lime juice
·         8 teaspoons Saigon cinnamon
·         8 cups raw sugar

It’s September now. School is about to begin. The last flush of blackberries clings to the brambles, begging to be picked. Nasty worms, white and chubby like maggots, infest the remaining Salal berries. Kitchen cabinets and linoleum, sticky from jam sessions, want for a final summer scrub. Mason jars line the pantry. Tomatoes, pickled peppers, heirloom pizza sauce, tomatillo-peach salsa, green-tomato relish, vegetable soup, salsa verde, spaghetti sauce and jam of every color bow the shelves. Jam, jam everywhere an no shelf-space to spare! There is enough jam to survive a zombie apocalypse. Can you guess what the relatives are getting for Christmas?

Tuesday, August 7, 2012

Day 240: Tomato Time – Summer’s First Blush

8/6/12


It’s hard to remain patient while waiting on tomatoes. Summer is stubborn this year. My garden suffers at least a two week delay. The waiting is even more difficult because of the mystery shrouding my vines. I have no idea what to expect in terms of variety. My planted seedlings failed to thrive, so I’m relying solely on volunteer plants that popped up from last year’s crop. I gathered the volunteer seedlings from raised beds and transplanted them to my tomato pots. I raise peppers, lettuce, tomatillos, eggplant, squash, peas, beans, and cucumbers in my raised beds and the tomato seedlings continue to pop up through the other crops like weeds. I may never have to plant tomatoes from seed again. That’s the beauty of raising heirlooms. Heirlooms keep on giving and grow like weeds.

Green globes weigh down the vines, promising a sweet crop and hinting of things to come. It seems that most of my plants are small salad types. I have a few large tomatoes on, but the majority are cherry-sized. Smaller tomatoes are my favorite anyway. Cherries ripen faster, are more split resistant, and the vines seem to fight blight a little longer. And it is the cherries that I found today. I saw red and yellow and a little purple peaking from a camouflage blanket of leaves this morning.

Today’s pick included the classic yellow pear, tiny Hawaiian Red Currant, Cuban yellow grape, and one of my all-time favorites, the purple-hued black cherry. Breakfast this morning was as it will be tomorrow morning, plucked from the vine and eaten in the garden. Summer has arrived, finally.

Monday, August 6, 2012

Day 239: Solar-Powered Dinner Party

8/5/12

I complain too much about Seabeck weather. I spend winter and spring pining for summer, and then spend most of summer whining over gray skies and cool temperature. But not yesterday, yesterday I got my summer. And yes, still I complained a little. It was so stinking hot!  

Nearly every Sunday, a handful of neighbors get together for dinner and a shot or two of vodka (I have Russian neighbors). It was my turn to host, but it was too hot to cook, and I was too lazy and frugal to drive into town and find an alternative to a home cooked meal. I decided to get creative.

I’d been looking for an excuse to build a solar-powered oven, like the one I saw demoed at the Mother Earth News Fair a few months ago. It was as a bell-shaped, cardboard structure with a flat bottom. Aluminum foil lining gathered the sun’s heat and reflected it back on a tin baking dish slid inside one of those plastic roasting bags. I looked through the steamy bag and watched the water in the pan simmer. I could not believe how well it worked. Something about the whole experience made me think back to the Easy-Bake oven Santa Claus failed to deliver one childhood Christmas Eve.

The young man at the solar booth explained how his non-profit organization was trying to get the solar cooking idea spread to third-world countries as an alternatiave for women who spend much of their day scrounging firewood to cook meals. The idea is awesome, but I questioned the availability and expense of cooking bags. As it turns out, the bags are not totally necessary, but do assist in heating speed, heat retention, and clean-up.

I found similar solar-cooking models online for about $40. But I wanted to make my own, or at least try. I dug around in the office and garage and found some boxes to up-cycle. I grabbed a box cutter, a roll of aluminum foil, a stapler, and my favorite construction material ever, duct tape. It took me about an hour to make my first prototype and another hour to get supper in the oven.

It was about 90 degrees on my back deck, but I was able to get the cooker up to 180 degrees. I didn’t have any of those roasting bags, so I used Pyrex pans and glass lids. The cooking was slow going, and I had to keep adjusting to avoid shadows. I’d like to make another cooker that comes apart easily for camping. Mine is bulky and storage is going to be an issue. I noted other flaws in the first prototype, areas to improve to increase heat. I got ambitious trying to accomodate more than one dish. My cooker ended up too big and open to be efficient. A one-pot model or dual one-pot models seem like a better option.

The most important thing is that the experiment worked. I stunned and amazed family and friends with my ingenuity and for a moment, felt like the professor on Gilligan’s Island. The quality of the meal was not up to usual standards, but I wasn’t all that disappointed. I proved it could be done. Sometimes being right tastes pretty damn good. I pulled off Sunday supper without heating up the house. We ate wild salmon with killer red huckleberry sauce, cowboy beans with roasted tomatillo salsa, corn bread with pepper jelly, ham, and my neighbor Luba’s fabulous green salad. Not too shabby for a first solar supper.

Sunday, August 5, 2012

Day 238: Celebrating the USCG's Birthday with Dungeness Crab

8/4/12

Today I celebrated the United States Coast Guard’s 222nd birthday with a cruise on the Hood Canal, a bottle of homebrewed Mountain Woman Red, and some of the best Dungeness crab ever eaten. It was on this date in 1790 that President George Washington commissioned the Revenue Cutter Service. The Revenue Cutter Service grew into the Coast Guard that we know today. The Coast Guard is unlike the other defense oriented services. Besides the mission of defense readiness, the USCG operates under another 10 demanding missions: ports, waterways, and coastal security, drug interdiction, aids to navigation, search and rescue, living marine resources, marine safety, law enforcement, migrant interdiction, marine environmental protection, and ice operations. There is seldom a dull moment.

I retired from the Coast Guard in December of 2009. One would assume that a woman retired from the USCG would have a decent amount of boating experience. This is a logical assumption, but a false one in my case. I spent my first 20 years high and dry serving in the Army and Army Reserve. I was lucky enough to jump the fence and become a Coast Guard officer in 2005. My only regret is that I hadn’t jumped twenty years earlier. I loved the Coast Guard, and wish my health would have allowed me to serve longer and learn more about going to sea.

My lack of boating skill and knowledge on the water is a source of personal embarrassment. I love being on the Hood Canal, but the learning curve without my old crew is steep. To make matters worse, I married a landlubber with almost zero interest in the sea. He doesn’t even care much for seafood. What is a wanna-be mermaid supposed to do?
I suppose learning to boat is a lot like learning anything else, but more expensive and dangerous if you are stupid. I try hard not to be stupid, but sometimes you just don’t know what you don’t know. There is so much to learn. I attack the knowledge acquisition like I attack most new quests. I research and then do it. This usually works out for the best.
I own a 1965 Boston Whaler. She’s just a little 13-footer and not much to look at, but she is a classic. The toughest part so far has been dropping her in the water and pulling her back out on the trailer without getting into a fist-fight with my husband. We don’t work well together – evidently. It looks easy when we watch other folks unload and load boats at the boat launch. We tried a few years ago, but the fighting ruined the trip and damaged my boat. I was so pissed off. I swore never to do it again. But time eases drama, and I was hungry for crab. So, we gave it another go. Not only did we not fight, we actually had a great time. Whew…
Jim-in-a-boat

The Hood Canal is full of amazing foods, and Dungeness crab is my favorite. I’ve tried crabbing on the canal before, but without a boat I didn’t have much luck. Today was different. I baited the pot with nasty smelling herring I let bake in the sun for a few hours. We dropped the pot with about 150 feet of line just outside of the traffic lane entering the boat launch. The idea was to drop the pot, cross over to a peninsula and state beach park, have a picnic, and pick up the pot on our way home.  
Toandos Peninsula State Park

It takes a decent amount of time and forearm strength to pull up a pot with 150 feet of line. I worked arm over arm, while chanting, “Please be crab. Please be crab.” I hoped for a couple Red Rock crabs for dinner. I had always understood that the best crab, the Dungeness, where out a lot further.
The pot felt heavier than I remembered, but I wasn’t sure if it was just wishful thinking. About halfway through the hoisting, we started speculating.
“Betcha got a pot full,” said Jim.

“Nah, probably pesky spider crabs, maybe a Red Rock.”
I need to be more optimistic. When the pot broke the surface of the water, I squealed. It was a long, shrill, girly squeal. Five lovely Dungeness crabs tussled with the wire mesh in hopes of freedom. The purplish hue of the shells and white tipped claws gave away their identity.  
Not-so-deadliest catch

Current regulations on the Hood prevent the taking of female Dungeness or males that are under 6 ¼ inches wide. The five crabs were on the small side. It was going to be close. I pulled out the first crab, a real fighter. It was a male and measured 6 ½ inches across the widest part of his shell. He was a keeper. The next crab took forever to get out of my trap. I flipped it over to examine his private parts, and he was a she. Male crabs have pointy appendages. Go figure. Female crabs have rounded girl-parts. Identification of sex couldn’t be more intuitive.  My catch yielded 3 male keepers and two females to release. I was thrilled.
Male crabs with pointy appendages

I checked on fresh crab prices the day before in an attempt to fuel my desire to get out on the water. A local grocery store advertised at $8.99 per pound.  It seems like a ridiculous price, but one that is readily paid by non-boaters all over Kitsap County. Each of my keepers weighed about 2 lbs. That’s over $50 for dinner, if I had purchased from the grocery. 
Crab season is short on the Hood Canal. It runs from July through the first week of September. With a drama-free crabbing trip under our belts and bellies full of fresh crab, we intend to hit the water again during this upcoming week. I pray for a drama-free launch and a full pot.
Sad eyes

Saturday, August 4, 2012

Day 237: Bonus Roo & Ronda, the Broody Hen of My Dreams

8/3/12
Pot-Pie, my new office mate

Craigslist is an amazing resource. I advertised for a broody hen, a plus-size surrogate to assist Lucy and Gerry in baby-making efforts. I didn’t get many responses. One helpful soul informed me that broody hens were hard to come by, and I might want to up my offer of $15. But I think fifteen-bucks for a surly hen that won’t lay eggs, eats and poops, and pecks hands trying to gather the eggs of others, could not be worth more than my offer. Even still, I worried.

About a week after my post, Kristi sent me an email: “Hi there, I’m so sorry to hear about your raccoon attack! We just lost a 2 year old barred Rock and a 5 week old Maran to a raccoon last week – they are vicious things! I have a 2 year old Barred Rock hen that I can’t stop being broody. She has actually been broody for about a month and I’ve tried to break her but she’s determined to sit on the nest all day. If you want her, you can have her for free... I also have a 5 week old chocolate Maran rooster that you can have if you want him – he was supposed to be a hen.

I know it’s silly to get excited over chickens, but I was thrilled. A broody hen and a little roo all for free. I met up with Kristi today to pick up the birds. She lives on beautiful Bainbridge Island, about 40 minutes from my house, but worth the trip.

Ronda is broody alright. She was sitting in her nest and acting rather nasty when I gathered her up. She is larger than I imagined. I’m guessing about 7lbs. The Barred Rock is a heritage breed, originating in Plymouth rock and prized as a dual-purpose bird, excellent for both meat and eggs. The breed is cold-hearty and known to be quiet and gentle. Ronda may be the exception. She's an old biddy of a bird and went psycho on me once I got her home. I really ought to wear gloves. If she keeps up her crap, her dual-purpose as a stewing hen may be tested.


The little roo is smaller than I assumed, so that leads me to some logistical juggling. I only have one coop, and he is too small to run with the big girls. I’m also not sure how Gerry will treat him. For now, the roo is living in my office – kind of odd, but he likes it.

Whenever one gets a “pet” from Craiglist, especially a pet that tastes delicious, it’s important to clarify plans. I plan to hang on to Ronda for brooding purposes, but the little Roo’s fate is less secure. I may wait until he is bigger and then eat him. I informed Kristi of my plans, just to be sure he was still available. She was fine with it, and had thought to eat him herself, but didn't know how to go about such things. I know it sounds harsh, but I'm hungry for chicken. I haven't had roasted poultry since I started this killing spree back in December. I plan to shoot quail or pheasant or duck or goose or wild turkey or something chicken-ish to satiate the need, but it hasn't happened yet.

I temporarily named the roo “Pot-Pie,” just to get used to the idea of raising something for dinner, but I’m having my doubts. He’s so damn cute and far to easy to adore. He is also a Cuckoo Maran, a rare breed that produces dark-chocolate colored eggs. I'd like to add Marans to my hen house, but they are hard to find. Maybe when he is older, he can make babies that will produced chocolate eggs.

 If I don't eat Pot-Pie, I'll have to eat Gerry. Sometimes two roosters can co-habitate as long as there is plenty of room to free-range and establish territories. But raccoons and coyotes eliminated free-ranging as an option.

The truth is there is only room for one cock in the hen house. And that room is conditional on behavior. I won’t have an aggressive rooster, one that jumps on me when I enter. Gerry is a sweetheart, but he’s starting to do that side-step thing around me. He thinks I’m a rooster and a threat to his status. Maybe I need my hormone levels checked. Maybe I’m putting off too much testosterone. This is the second crazy rooster that confused me for a dude… It’s tough on the self-esteem.

Thursday, July 26, 2012

Day 226: Do-it-yourself Huckleberry Rake

July 26, 2012

I’m still excited about my huckleberry adventure and the halibut and huckleberry dinner that followed. Two crystal canning jars of garnet jelly wait on the countertop and tempt everyone passing. Jaden asked me three times in two days if he can open a jar. The answer is always the same, “We are saving it for Thanksgiving, or for when I kill something that tastes like chicken.”

Making jelly isn’t the only way to preserve the berries, but it might be the tastiest. I shy away from freezing too many items based on shelf-space. I’m hoping to fill the freezer with a deer or an elk this year. Or maybe I'll copy my hero, Michael Pollan, and kill a wild hog. I saw a booth for Texas wild hog hunts at the Sportsman show this year. It’s probably wishful thinking, but I’m staying positive and keeping a few shelves reserved just in case. Eating in season is always best, but there is only so many huckleberries we can eat in such a short production span. I like to experiment with different methods of keeping food for later enjoyment.

Northwest tribal folk dried huckleberries in large cakes and stacked the cakes until ready to use. I picture great purple wheels, like towers of cheese, stacked to the ceiling in corners of longhouses. When berries where needed, a chunk of a wheel was broken off and reconstituted in water. I’ve also seen recommendations for mashing the berries and spreading them out across a screen to dry in the sun. When the mash is dry, it can be crumbled and sealed in storage containers.  I’ll try this option, as I don’t have a free corner to stack cakes of berries. My least favorite preservation discovery is to store the berries in bacon grease or used cooking oil. Yuck! Now that just sounds nasty, but not when considering the huckleberry’s traditional use as fish bait. I never really thought of the huckleberry as fish bait, but it makes perfect sense. It's the exact right bite for a #8 trout hook. I’ve purchased little red eggs packed in small jars to bait my hook, but never caught a single fish with the store bought bait. Maybe it’s time to try something a bit more natural (and free).

Of course I wanted one of those fancy huckleberry picking rakes. I found one on Amazon.com for about $25 with shipping. Amazon has everything. Now $25 won’t break the bank, but I’m skeptical about the purchase in general. I mean, do I really want to fork out cash for an item I will use a couple times this year, put away and then not find or forget about next year? Probably not.

I decided to make my own, or at least try. The first prototype started out as a tall, rectangular container that once held those yummy peanut-butter pretzel pillows you buy at Costco. I save containers like this one, tucking them in back of the pantry for who-knows-what or carting them out to my pottery studio to use for glaze mixing. I’m a bit of a hoarder when it comes to plastics.

I used a box-cutting knife with razor to cut the bottom out, but only until I almost sank the blade into my thigh, then I resigned to sharp scissors. Scissors work best, providing much more control. I cut one edge of the box lower than the other, and then cut “fringe” or fork tines on the longer edge. The idea was to use the container as a scoop and scoop up a clump of bushes and comb the berries through the tines. It worked kind of okay. I quickly noted to design flaws. 1) My tines were too far apart and I could only collect the largest of the berries. 2) The plastic tines were a little too flexy and sometime the berries would not come off easily and bent back the tines.

I created a second huckleberry rake using a large grape juice bottle. The plastic walls of the bottle were thicker than the pretzel container. I also left very little space between tines. For the test-drive I combed the bushes and gathered about 2 cups of berries in less than 10 minutes. I can pick enough for a pie in about thirty minutes. That’s half the time it took me to pick the last 6 cups (that turned into 4 cups because of Jasper and the boys).


The bottle-rake worked much better than the pretzel-rake. I’m not going to rate it five-stars or anything, but I’d give a 2+, maybe a 3. My rake is certainly not as pretty as the bright red commercial rake from Amazon.com. I admit to having a bit of rake-envy, but I’ll get over it. The bottle rake cost nothing to make. It’s light and easy to use. Best of all, I don’t have to store it in the already crowded garage until next season, and I don’t have to remember where I stored the thing. It’s basically a disposable tool. So all in all, I’m happy with my rake, but I do have my eye on a nearly empty, blue jug of laundry detergent. That ought to make a real nice rake...

Wednesday, July 25, 2012

Day 225: Seeking Plus-Size Surrogate for Threesome – Age & Race Unimportant

July 25, 2012

The love affair of Gerry and Lucy bloomed. The handsome couple seems inseparable. The pair enjoys a spacious coop and yard built for a dozen birds. The coop structure has been fortified and no animal attacks, not even invading ground squirrels, have threatened. Food and water are plentiful and not a day goes by that the birds are not treated to fresh bolts of succulent lettuce or scratch corn.

I’m sure Gerry and Lucy are very happy. But I am not. I expected the pitter-patter of tiny feet and the chirp-chirping of bitty beaks. Lucy is laying fertilized eggs. I can see the fertilized dot, the start of an embryo, when I crack an egg into the pan. The dot is smaller than an eraser head and a shade or two lighter than the yolk. Its existence has no effect on the flavor or quality of the egg. I know there are some folks that argue for the nutritional superiority of fertilized eggs, but I have my doubts. Really, it’s just the tiniest dot. How much nutrition could be packed in to an eraser head?  

Chicken sex is happening. But Lucy is refusing to sit on her eggs. In barnyard terms, she is not a broody hen. Going broody is the term given when a laying hen decides to sit on her eggs to hatch them. The hen gathers a clutch of eggs (sometimes from other hens) and stops laying until her clutch hatches and her babies no longer need her. In production egg farms, and even hobby farms like mine, broody is not usually a favorable thing.

A broody hen will stay in a nest and often peck a hand reaching into gather an egg. The hen eats her fair share but fails to produce. Broodiness is an instinct that is often unwanted and hens with too much mothering instinct often find their way into the stewpot. And this is where the whole natural selection phenomenon just blows me away…

The mothering instinct that makes a hen go broody has been bred-out of common commercial varieties and many popular backyard varieties. Lucy is a black Australorp, a bird often selected by hobbyist for her gentle nature, excellent egg production, heartiness, and beauty. Basically, Lucy is a perfect layer and pet. Selective cultivation of her breed developed a reliable bird that is easy on the eyes, fills the fridge, and doesn’t peck fingers.

After extensive research, I’m faced with the reality that no matter how much sex Gerry throws down, Lucy is not going to settle in and hatch her eggs. I need a surrogate, a bird with her broodiness instinct still intact, maybe a breed not prized for egg production,  or one that folks fancy because its super cute, or quirky, or rare. A bantam would be the obvious answer. Bantams are small and lay tiny eggs. "Henny," the little bantam lost to the raccoon attack was only a quarter the size of a standard chicken. But that leads me to another problem: I don’t want a little hen getting the crap knocked out of her by Lucy. This can happen when introducing a new hen to an already established pecking order. And I certainly don’t want big ole Gerry getting frisky and jumping all over a bitty gal either. That is just gross!

So I guess it’s time to write a personal ad on Craigslist and see if I can find the girl I’m looking for. She needs to be rather sedentary, happy just sitting around all day. She should do her best to respect her coop-mates. She must be a good mother. And obviously, she’s got to be up for a threesome. Tall order, don't you think?

Tuesday, July 24, 2012

Day 224: Foraging Wild Red Huckleberries

July 24, 2012

The Red Huckleberry, or Vaccinium parvifolium, with its sweet-tart taste was a part of my Oregon childhood. I sampled them green in the spring, even though Mother warned of tummy aches. And I ate handfuls of bright red berries in the summer, even though Mother warned of tummy aches. Several bushes grow wild on my Seabeck property, and I eat them regularly as I garden or do yard work. The berries never caused tummy aches while I was growing up, and they still do not. The abundance of fruit-laden bushes along my roadway is great. I’m guessing tummy-ache phobia leaves red huckleberries for the birds. My neighbors have no idea what they are missing.

The red huckleberry, like most berries, is loaded with vitamin C. But honestly, they don’t taste all that great in the natural state. I mean, they are okay, kind of fun to eat, but not really all that sweet and yummy like a blackberry or a wild strawberry. I eat them because the berries exist and like a bird, I’m attracted to the bright red hue. I do not eat them for taste or hunger satiation. I’ve never been that desperate.

Since starting my killing spree, I see food in nature differently. Red huckleberries have only been an amusement, not a food source. But now I realize how silly it is to let a fiber-loaded, vitamin and iron rich antioxidant go to waste. So I picked.

Huckleberries are tiny, like little red currents, and hard to pick, like plucking precious pearl earrings snagged in shag carpeting. It took me an hour to gather six cups. Later I learned that real huckleberry pickers use rakes and comb the bushes rather than finger each tiny morsel.


I gathered enough for a pie and decided to try my hand at a wild dessert for tonight’s supper. Unfortunately, Jasper – my awesome helper dog, ate approximately a cup of berries from my container while I wasn’t looking. Jade and Garret, unaware of dog slobber, polished off another cup. I was picked-out for the day, so I had to come up with another idea.

I Google searched for wild huckleberry recipes and ran across fellow forager, Langdon Cook’s blogspot. I met Langdon at a mushroom society meeting several months ago. I bought his book, Fat of the Land. He gave me an autograph, and that was that. So, it was kind of fun to virtually cross paths as I read his suggestion for broiled halibut with red huckleberries. http://fat-of-the-land.blogspot.com/2009/08/broiled-halibut-with-red-huckleberry.html

Langdon recommended making a chutney-like substance out of the huckleberries and using it to sauce the fish. This sounds great to me and I just happen to have some lovely halibut I caught during my May visit to Alaska. Langdon recommended the following recipe for the chutney:
1 1/2 cups red huckleberries
1/4 cup port
1/2 cup sugar
1 tbsp balsamic
1/8 tsp cinnamon
1/8 tsp nutmeg
1 tbsp lemon juice

Well, as it turns out, I’m fresh out of port. Actually, I’ve never purchased port before. I’ve enjoyed it only a time or two. Perhaps I need to change my port habits. Anyway, I’m also not one for following directions, especially when said directions are issued from a man. It’s a personality flaw that I’m not really doing much to remedy at the present time. However, I did use Langdon’s recipe as guide to create my own killer sauce. The genius ingredient that I find most inspiring is the balsamic. I think this is what saves the sauce from being a preserve better intended for biscuits.  

I decided to go balls-out and make enough to glaze tonight’s fish and enough to put away just in case I ever kill a pheasant or quail or duck or squab (I don’t yet know what a squab is) or something turkey-like. Maybe I’ll save a jar for Thanksgiving.

Christine’s Recipe: Killer Red Huckleberry Sauce (makes about 2 ½ cups)
4 cups of wild, red huckleberries (dog slobber and leaves removed).
½ cup cabernet
½ organic grape juice
1 ½ cups raw sugar
1 tsp Saigon cinnamon
3 tbsp fresh lime juice
Coarsely grated peel of whole orange
3 tbsp Fig balsamic

1.    Bring everything but the fig balsamic to boil in heavy saucepan. Reduce until natural pectin starts to jell. Stir in the balsamic and cook over low heat until the mixture looks thick enough to spread.

2.    (I pulled 1/2 cup to glaze my fish and then canned the rest). Ladle into 2 sterile half-pint jars, seal with sterile 2-piece lids, and process in hot water bath. Canning is so much easier than you might think, but a little research is always a good idea. Try this website: http://www.motherearthnews.com/real-food/how-to-can-jam-jelly-zecz11zsmi.aspx
There is much to learn about wild huckleberries and much more I’d like to share with you. But I had to get the fish on the grill and feed these hungry boys of mine. I smoked the halibut low and slow, basting it with my huckleberry glaze. So damn fabulous...


I have a feeling that huckleberries, red and purple, will become a staple in my pantry. I also know I'll be looking into the purchase of a huckleberry rake. Proper tools always make a task more enjoyable.

I may even hit a few festivals and meet huckleberry aficionados and newbie fanciers, like me. Maybe I'll see you there. http://wildhuckleberry.com/category/huckleberry-festivals/

Monday, July 23, 2012

Day 226: The War on Tomato Blight

July 23, 2012
purple Jasper

I’m a little more than tomato crazy. It’s kind of an addiction. I attempt cultivation of over 15 heirloom varieties from unusual seeds collected around the world. I grow white, cream, orange, pink, purple, neon green, yellow, black, and even a few red tomatoes of varying sizes and shapes. A hobby gone wild is a bit of an understatement.
16oz Sweetheart

I’m always looking for better methods to grow heirloom tomatoes. In my geographical location, the beautiful and rainy Pacific Northwest, growing tomatoes can be somewhat of a challenge. Apart from our not-so-sunny skies, overwatering, under-watering, and tomato blight pose problems.
blight on stem

My first crop of tomatoes was obliterated by a powdery black mildew that started on a few leaves and spread in a matter of days. Grass-green tomatoes were left to decompose on rotting vines. I ate a ton of fried green tomatoes and canned tubs of green tomato relish that year.

After my first tomato-flop, I researched blight causes and remedies. I learned the fungus responsible for tomato blight exists in the soil. It is recommended that infected soil, like the dump-truck full of very expensive organic stuff I purchased from a well-respected dealer and carted by the wheelbarrow full down a huge hill and into my garden beds, be replaced yearly. For me, that’s not an economical or labor-friendly solution. It took me weeks to move a truck-load of soil down a steep hill. No to mention, I spent $500 for the stuff. Starting my garden organically was important to me. Unfortunately, organic did not mean sterile. And there is nothing inorganic about naturally occurring fungus flourishing in our wet conditions.
blighted vines

Several natural gardening sites recommended adding soil amendments, like copper. But in the end, most concede there isn’t much to be done to repair infected soil.  I added copper the second year and blight held off a bit longer, but by mid-August, I noticed a few black mildew spots. A week later my crop was gone and the fried green tomato eating commenced.
blight spots

After hours of research, it seems the most economical way to battle blight is through careful watering. Overwatered and under-watered tomatoes are susceptible to diseases, pest infestations, and blights. The interesting thing about tomato blight is that it doesn’t seem to grow or spread on dry leaves and it cannot infect the leaves unless the fungus-infested soil splashes on the plant during watering.

So the trick is to water the tomato without getting it wet and to keep the infected soil from touching the plant. Sounds almost impossible, but I’ve figured out a way. My first impulse was to purchase several commercial containers with automatic watering systems to keep my plants dry. But the investment of $30 per tomato planter was too great. I needed a do-it-yourself option.

I made almost-free self-watering planters using buckets. The construction of each planter requires two 5-gallon buckets, a pint container with plenty of punched holes, and a 4ft length of 1” PVC pipe.  I scavenged and purchased 100 bucket, and I already had dozens of square, plastic flower pots leftover from purchasing flowers and seedlings. Large yogurt containers with holes punched along the walls also work great.

The idea is to stack the buckets and use the space created between the stack to hold a reservoir of water. The inner bucket holds the soil plant, while the outer bucket acts as the water reservoir. I drilled a few holes in the inner bucket and cut out a square space to insert the pint-sized flower pot. The flower pot extends into the reservoir and allows the soil and roots to act as a wick and move the water up through the plant. I also cut a 1” hole with a hole-saw bit. The length of PVC pipe stuffed through the hole serves not only as a way to deliver water into the reservoir, but also works great as a plant stake to provide support to the growing plant.
potted tomatoes

Once the buckets were constructed and filled with dirt, I transplanted tomato seedlings and packed cedar shavings around each seedling. The cedar created a barrier between blight-infected soil and my precious heirlooms. The shavings also prevent cut worms and other nasty pests from breeding in the soil.

So far, I see no signs of the powdery, black mildew. It’s only mid-July and a little too early to tell if my battle with the blight will be victorious.  The individual plants consume the perfect amount of water every day. There is no risk of overwatering. Reservoirs need replenished every 3 days. The task saves time and is as easy as sticking the garden hose down into the PVC pipe and allowing the space between the buckets to fill.


The greenhouse is packed with 50 healthy plants, most of them towering over me. The plants are loaded with yellow blossoms and what seems like zillions of green tomatoes. A lack of warm weather and sunshine set my garden back a couple of weeks, so I’m not counting on fresh tomatoes for another week or two. Although delayed, the crop looks promising. I’ll eat fresh tomatoes throughout the summer until the first frost in November forces a clean pick of remaining fruit. If all goes well, there will be lots of sauce making to keep me busy and to get me through until next spring, when I start the whole process over again.